Lucy’s cauliflower and broccoli cheese

We’ll actually it’s Jamie’s really, but I love it so much I have adopted it in to my repertoire x I’ve been making it so much lately as it’s great in this cold weather with a nice bit of toasted Ciabatta lashed in butter x

C & B cheese_0045_edited-1

Ingredients

  • 2 cloves of garlic
  • 50 g unsalted butter
  • 50 g plain flour
  • 500 ml semi-skimmed milk
  • 500 g fresh or frozen broccoli
  • 75 g mature cheddar cheese
  • 1 kg fresh or frozen cauliflower
  • 2 slices of ciabatta or stale bread
  • 2 sprigs of fresh thyme
  • 25 g flaked almonds
  • olive oil

C & B cheese_0038_edited-1

Method

  1. Preheat the oven to 180°C/350°F/gas 4. Peel and finely slice the garlic and put it into a medium pan on a medium heat with the butter. When the butter has melted, stir in the flour for a minute to make a paste, then gradually add the milk, whisking as you go, until lovely and smooth. Add the broccoli (cut up first, if using fresh) and simmer for around 20 minutes, or until the broccoli is cooked through and starts to break down, then mash or blitz with a stick blender (adding an extra splash of milk to loosen, if using fresh broccoli). Grate in half the Cheddar and season to perfection.
  2. Arrange the cauliflower in an appropriately sized baking dish (cut into florets first, if using fresh), pour over the broccoli white sauce and grate over the remaining Cheddar. Blitz the bread into breadcrumbs in a food processor, then pulse in the thyme leaves and almonds. Toss with a lug of oil and a pinch of salt and pepper, then scatter evenly over the cauliflower cheese.
  3. Bake for 1 hour, or until golden and cooked through, then enjoy!

C & B cheese_0056_edited-1

C & B cheese_0064_edited-1

Strawberry cake

Just found this post sitting in my drafts folder from a few weeks ago and thought it was about time I posted it ……oops x

I made this at the same time as I made my Lemon meringue cupcakes for the Itsgood2eatcake2 event and have some how forgotten to schedule it…..haha x

But here it is now, better late than never x 🙂

Blog photos_0008_edited-1

Ingredients

  • 210g self-raising flour
  • 25g cornflour
  • 225g golden caster sugar
  • 1 tsp baking powder
  • 225g unsalted butter, at room temperature, plus more for greasing tins
  • 4 large eggs
  • 225g fresh strawberries, hulled and chopped into small pieces
  • 1 tsp vanilla extract
  • 250g fresh strawberries hulled, to decorate

For the filling

  • 250g butter, softened
  • 1 teaspoon vanilla extract
  • 600g icing sugar
  • 2 tablespoons milk
  • pink food colouring
  • 3-4 tbsp strawberry jam
  • A few fresh strawberries, hulled and sliced

Blog photos_0015_edited-1

Method

Buttercream

  1. In a large bowl, cream together the butter and vanilla. Blend in the sugar, a quarter at a time, beating well after each addition.
  2. Beat in the milk, and continue mixing until light and fluffy.
  3. Add the food colouring and mix thoroughly.
  4. Keep icing covered until ready to decorate.

Blog photos_0016_edited-1

Sponges and construction

  1. Preheat the oven to 180ºC. Grease 2 x 20cm sandwich tins and line the base of each tin with baking paper.
  2. Sift the flour, cornflour, sugar and baking powder into the bowl of a food processor. Pulse until evenly mixed. Add the butter, eggs, strawberries and vanilla extract and process briefly until well combined, but not overly processed.
  3. Divide the mixture evenly between the 2 cake tins and smooth the tops with a spatula. Bake in the centre of the oven for 25 minutes, until a skewer inserted into the centre of one of the cakes comes out clean.
  4. Leave the cakes to cool slightly in their tins for 10 minutes and turn out on to wire racks.
  5. When the cakes are completely cool, remove the baking paper circles from their bases. Place 1 cake on a plate and spread with a thin layer of strawberry jam.
  6. Then place a thin layer of sliced strawberries on top of the jam.
  7. Hold the second cake and ice the underside of it with a 1cm thick layer of vanilla buttercream.
  8. Carefully place on top of the first cake, iced side down. Once the cakes are sandwiched together, ice the top with the remaining buttercream and top with the fresh strawberries.

This cake is best served immediately, as the fresh strawberries do have a tendency to soften and bleed their juice into the the icing quite quickly.

Blog photos_0017_edited-1

Lemon meringue cupcakes x

Blog photos_0035_edited-1It’s been quite a while since I last posted a recipe for you all, I’m so sorry!!!

Luckily I have a great recipe for your delight today, in fact it’s one that I have perfected for some time now, just for you!! I hope it makes up for my absence?! x

I’ve been making these Lemon meringue cupcakes all summer and I have to say they are loved by all my friends!! Perhaps that’s why I keep making them so often!!……haha x

I do love them myself too, but I have always been a sucker for lemon meringue x

Blog photos_0032_edited-1

Ingredients for the sponge

  • 200g unsalted butter, softened
  • 200g caster sugar
  • pinch of salt
  • seeds of ½ vanilla pod
  • 4 medium eggs
  • 200g self raising flour

Method for cupcakes sponge

  1. Place the butter, sugar, salt and vanilla seeds in a mixing bowl and cream together until pale and fluffy.
  2. Beat the eggs lightly in another bowl and slowly add to the butter mixture while whisking quickly. If the mixture starts to seperate or curdle, stop adding the egg and beat in 2-3 tablespoons of flour. This will rebind the batter.
  3. Once all the egg has been incorporated into the butter mixture, sift in the flour and stir until the batter is just combined. This will ensure the sponges stay light and fluffy.
  4. Using a plastic piping bag or a tablespoon, carefully place the batter into the cupcake cases until two-thirds full only.
  5. Bake for 12-15 minutes, at 175ºC, depending on your oven. The cupcakes are cooked when the tops are golden brown and spring back to the touch. If in doubt, insert a clean knife or wooden skewer into the centre of each sponge, it should come out

Blog photos_0041_edited-1

Ingredients for toppings

  • Jar of lemon curd
  • 120g of egg whites (approx. 3 large eggs)
  • Pinch of cream of tartar
  • 240g caster sugar

Method for toppings

  1. Whisk the whites and cream of tartar until foamy then add half the sugar and continue whisking until glossy and thick, do not over beat. Add the rest of the sugar and whisk for a few seconds.
  2. Pipe a ring of meringue around the outside of the cupcake.
  3. Place a teaspoon of lemon curd into the centre, then top with a second rosette of meringue. Add a few jelly segments to the meringue and sprinkle with a little granulated sugar.
  4. Place on a baking tray and place into the hot oven to brown for a couple of minutes. Remove, dust with icing sugar and serve cool.

Blog photos_0043_edited-1

More cake!!!!! #ItsGood2EatCake2

After the success of the the first It’sGood2EatCake charity cake eating event, the Edinburgh Bakers held there second event last night for the amazing Edinburgh children’s cancer charity Itsgood2give run by Lynne McNicoll.

It’s only 3 weeks now until Lynne and Wilma (and 29 others) are going to be climbing Mount Kilimanjaro to raise money for the charity, they have raised £86,000 (approx) so far and are hoping to reach their target of £100,000 by the time all the monies are in, so if you would like to help please pop over to either or both of their donations pages here or here and give generously x Good luck when the time comes girls x

The Venue this time was the stunning Cafe Musa on the mound again, which is always just the perfect place to enjoy cake and good company x With Alison, Wilma, Wendy and Lou doing such a great job hosting and organising everything in the background with military precision everyone got their cake and was able to stuff their faces to their hearts content. ♥

And of course I was allowed the honour of taking photos again this time of all the wonderful cakes that everyone had lovingly created and brought along with them, before they were devoured x Special thanks to Lauryn and Nadine for helping me get through all the cakes by writing all their labels and running them to the table to be photographed, they are wee stars x I’d still be there yet without their help x

There was a raffle again this time, with lots of amazing prizes (one of which I won…………Yeah!!) , the raffle tickets were diligently handled and sold by Ross again with the help of one of his friends this time.

And the star prize was another glorious cake made by Lou at LoulaBelle Bakes fair hands x Totally stunning, with an actual teacup and saucer made out of fondant on the top!

Itsgood2eatcake2_0198_edited-2

All in all, it was another glorious evening with great friends, that has hopefully raised a tonne of cash for a very deserving charity x

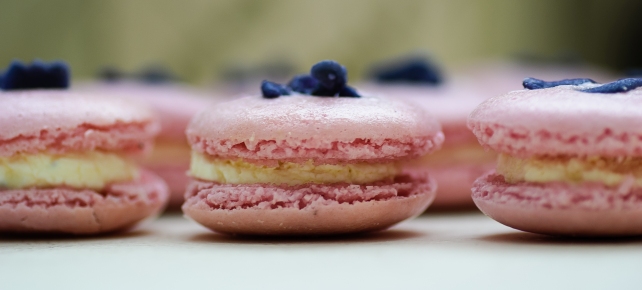
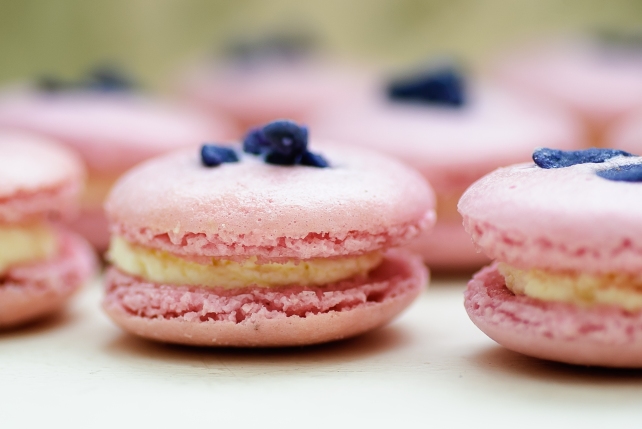
Parma violet macarons

Well here we go again, a large absence on my part……..oops x I think I just have to accept that I am not going to blog as much over the summer period. Lots of very exciting things going on to keep me distracted. But I will try to put up the odd post here and there x

Today is a good one, I’ve been working on this macaron recipe for a while now to get it right and I’m pleased to finally be sharing it with you all now.

Parma violets are a firm favourite from my childhood and I could smell them all day, the smell is so amazing!! So I had to find a way to incorporate them in to a recipe!! I hope you like these as much as I do!! 🙂 x

Parma violet macarons

Ingredients: Shells

  • 200g icing sugar
  • 200g ground almonds
  • 80ml water
  • 200g caster sugar
  • 2 x 80g egg whites (approximately the egg whites of 4 large eggs)
  • 1tsp violet flavouring
  • food colouring
  • Crystallised violet petals

Filling:

  • 200ml Double cream
  • 1tsp vanilla extract

Parma violet macarons

Method:

  1. Mix the icing sugar and ground almonds together thoroughly until you have a fine, even powder. Sieve and set aside.
  2. In a saucepan, bring the water and the caster sugar to the boil. Use a thermometer to ensure that the temperature of the syrup does not exceed 110ºC. This is very important.
  3. Whisk half the egg whites until they form soft peaks, not too stiff.
  4. Decrease the speed of the whisk, then, still whisking, pour the sugar syrup over the egg whites in a thin line. Continue whisking until the mixture has almost cooled, this will take a while and will be easier in a food mixer.
  5. Mix the other half of the egg whites (unbeaten) with the sugar and almond base to get a thick paste.
  6. Add the food colouring to the almond paste, this allows the colour to be mixed in well without overworking the meringue mix (as this can sometimes have disastrous consequences). Then add the violet flavouring.
  7. Add a little of the meringue to the almond paste with a flexible spatula and stir in with regular motion from the bottom towards the top and from the edges towards the centre of the bowl. Add the rest of the meringue in one go and mix in gently. This is a crucial step: it is the art of making macarons. The consistency of the macaron mix should be smooth, even and runny.
  8. Fill a piping bag with macaron mix and pipe small even discs of mix on to a tray covered with grease proof paper. Add crystallised petals to the top of half of the shells (you may want to choose the best half for this….heehee). Lightly tap the bottom of the tray on the work surface to remove any small air bubbles. Put the tray aside for 1 hour to allow the shells to dry, then bake in a preheated oven for 15 minutes at 145ºC (or fan assited oven 125ºC).
  9. Immediately on taking the macaron shells out of the oven, slide the greaseproof paper on to a lightly dampened surface. This will stop them over cooking and make them easier to remove from the paper.
  10. The shells should be smooth and glossy with a good colour.

Filling:

  1. Whisk the double cream and vanilla extract in a bowl until it thickens sufficiently.
  2. Fill a piping bag and squeeze a good amount on to the bottom layer shells and the sandwich the upper layer on.

Parma violet macarons

Small mercies x

A very short post today x

The last few days have been a trial for me and it is small mercies that have gotten me through the worst of the unexplainable rage and mood swings that I have experienced!!

Like these beautiful new measuring cups that came in to my possession only a few days ago! 🙂 x

Measuring cups

They are so cute and adorable, aren’t they?

Measuring cups

I was lucky enough to come across them in Anthropologie on George Street here in Edinburgh and it took only seconds for me to decide that they would be mine after finding them x

Measuring cupsI can’t wait to try them out over the next few days when I bake!!

But what to bake???

Watch this space 🙂 x

#itsgood2eatcake ♥

This gallery contains 22 photos.

Last night was my second event with the Edinburgh bakers, which happened to be a charity event this time in aid of the local Edinburgh based charity It’s good 2 give!! run by the wonderfully dedicated Lynne McNicoll, who help to support young people … Continue reading

Hello x

Start of hormones
Hello everyone, sorry about the long absence, real life seems to have gotten in the way again!! I’ve been very busy getting on with my new life and enjoying being a bit of a social butterfly finally, but it means I have neglected all of my bloggy friends x 😦 There has been a lot of exciting things happening to me this last few weeks and hopefully I will share them with you at some point soon x
Start of hormones
I intend to try and be better (but I always say that) in future and remember to take photos and bake more for blogging purposes!! Promise x 🙂
Start of hormones
For now here are some photos I took a couple of days ago, I’ve been thinking about my own personal style quite a bit lately, as I have been venturing into the world more and more, I have been trying to  hone  my everyday look. And it occurred to me that I have stopped taking photos to journal my progress as I was doing in the past. The reason I started up this blog again was to have a sort of journal of my journey into womanhood and think I have been neglecting that part of blog a bit lately. So I think I need to try and be better at lifestyle posts again in future.
Start of hormones
So what have you all been up too?
What have I missed?
Lucy xx

Mamma’s fruit loaf

Ok, I don’t actually call her Mamma, just Mum x But Mamma sounds so much better, don’t you think? heehee x

When I first started baking this time last year my Mum wrote down here recipe for Fruit loaf and it’s been pinned to my notice board ever since waiting patiently for me to get round to trying it out!! I’m not sure it is quite up to her standards yet, but I think I’ve done not bad for a first attempt and will play around and perfect it to my own tastes in the years to come x

Fruit loaf

Ingredients:

  • ½llb Unsalted butter
  • 1 cup caster sugar
  • 2 cups Sultanas
  • 1 cup water
  • 1 teaspoon Bicarbonate of soda
  • 2 eggs
  • 2 cups self raising flour

Fruit loaf

Method:

  1. Line a loaf tin with backing parchment.
  2. In a medium heavy pan add the butter, sugar, sultanas, water and bicarbonate of soda on a medium heat until the sugar has dissolved and the butter has melted, then turn up the temperature to full and bring to the boil, then continue boiling for 10 minutes. Set aside to cool for a couple of hours.
  3. Beat the eggs and them to the mixture, add the flour and mix well.
  4. Transfer mixture to the loaf tin and place in the oven at 170°C for 1½ hours.

Fruit loaf

I like mine with lashings of butter and a pot of tea x

Thanks Mum xx 🙂

How do you like yours?

Casa Angelina

This week, my friend Gayle and I got together to try out a new vintage tearoom on London street, Edinburgh called Casa Angelina to see what all the fuss was about!! And trust me there has been a lot of buzz since they opened only a few short weeks ago!! So I booked us a table for Thursday afternoon to try it out for ourselves and Wow!!!!! Just Wow!!!

Casa Angelina

Casa Angelina is run by Marie Claire and her partner (who’s name I didn’t catch) who are both highly trained  pâtissier/pâtissière’s!! Which you can instantly tell from the gorgeous array of desserts and pastries on offer x We savoured every mouthful for the couple of hours it took to get through all of our delights xx

Casa Angelina

The ambience in the tearoom was so lovely and relaxed with other tables chatting to each other and kids dressing up from a couple of trunks of pretty things left out for just such a purpose. Adding to this having Marie Claire checking on us regularly and bringing us fresh pots of tea (at no extra cost) we just felt so relaxed and kind of lost track of time for a few hours which was just heavenly xx

I can’t wait for my next visit, which is already booked by the way….heehee x

If you get the chance and have some time to indulge in a little luxurious girliness some afternoon then I recommend you get along to Casa Angelina without any hesitation xx